Posts

Showing posts from August, 2021

Complete 192.168.1.250 New Extender Setup In Easy Steps

Image
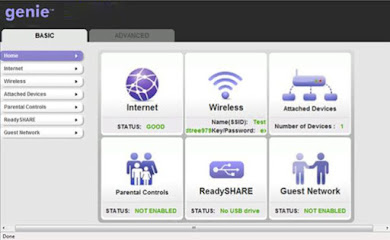
Have you ever thought about buying a Netgear extender? You must have seen that there are different variants available for different types of users. You need to complete the 192.168.1.250 New Extender Setup in order to use it. Moreover, most of the Netgear extenders used to have a different IP address for the login and setup purposes. So, if your Netgear extender has the IP address of 192.168.1.250, then you will complete the setup with this IP address. Though, the steps used to remain quite the same for all the IP addresses. If you have any confusion, then this blog has explained the steps for 192.168.1.250 New Extender Setup . So, this blog is going to remove all your confusions regarding the setup procedure. So, let’s get started with the steps and complete the setup.   Easy Way To Complete 192.168.1.250 New Extender Setup The easiest way to complete the setup of your extender is the web browser method using  the IP address. So, if you know about the IP address of your

How To Complete Netgear AC1200 WiFi Range Extender Setup Quickly?

Image
Have you bought the Netgear AC1200 WiFi range extender for the extension of your network covering a wide range? Well, you have made a great choice. Though, to use it, first you will complete the Netgear AC1200 WiFi Range Extender Setup . There are so many ways available. But, today in this blog, the method that is described is the quick one. So, there is no other method more quicker than the QPS method. In this blog, the steps for completing the Netgear AC1200 WiFi Range Extender Setup are explained for the WPS method. So, it is a matter of 1-2 minutes to complete the range extender setup with the WPS. Therefore, there is no point in waiting much. Let’s move straight to the steps now!     Steps To Complete Netgear AC1200 WiFi Range Extender Setup With WPS Method  There is no doubt that you can complete the setup of your extender so quickly with the WPS method. But, the only thing is that you should confirm that your main router must have the WPS feature as well. If is so, then yo

Get Setup Assistance With Netgear Installation Assistant For Netgear Extenders

Image
  The very first name that will come into your mind for extending the network would be the Netgear extenders. The great thing is that you have the Get Setup Assistance With Netgear Installation Assistant For Netgear Extenders to complete the setup of your Netgear extender. Isn’t it going to make things easier for you? Well, the answer would definitely be yes. But, if you need help to know about how to use the Netgear Installation Assistant , you are in the right place. From this blog, you will get to know about the steps to complete the setup for your Netgear extender with the installation assistant. So, without taking a single more minute, let’s get started with the steps to complete the Netgear extender setup! Steps To Complete Extender Setup With Netgear Installation Assistant  To complete the extender’s setup, there are different methods available. But, how to get sure whether you are doing the setup properly or not. Well, there is the Netgear Installation

192.168.1.250 New Extender Setup | Netgear Extender Setup With Default IP Address

Image
It is not always necessary that there would be any link for the setup of your extenders. Instead of the access links, you can use the default IP address. You can use the 192.168.1.250 new extender setup to complete the setup of your Netgear extender. Therefore, in case, the access link is not working for you for the Netgear extender setup. Then, you can enter the default IP address 192.168.1.250, and complete the Netgear login. If you are looking for the steps to complete the 192.168.1.250 new extender setup . There is no need to go anywhere else as you are in the right place. In this blog, you will get the steps to complete the new Netgear extender setup in a few simple steps. So, let’s get started!     Learn How To Complete The 192.168.1.250 New Extender Setup Using the default IP address always makes sure that there is no error in the access link for the router or the extender. So, it is always good to complete the setup with the default I

HOW TO FIX NETGEAR GENIE SETUP ISSUES?

Image
Netgear has made its extender setup easy with the Netgear Genie Smart Setup . With this smart wizard, you can easily complete the setup for your Netgear extender with the on-screen instructions. It means there will be no confusion to complete the setup. But, what to do if the wizard is still open even after completing the  Netgear Genie Smart Setup . This issue needs troubleshooting as you won’t be able to use the internet with the Netgear extender. When it remains open, it means the setup has not been completed, and you cannot connect to the extender’s network. So, there is a strict need to resolve this issue. From this blog, you will learn the ways to fix this issue for the Netgear extender setup . So, let’s get started!   Steps To Fix Netgear Genie Setup Issues Before you start fixing the issue, you must know what is creating the problem. When the Netgear Genie Smart wizard does not disappear after the setup, then it means there is a configuration error. Therefore, i

mywifiext not working | Troubleshoot Netgear Extender | Netgear Extender Not Working

Image
 There is no doubt, Netgear extenders are efficient extenders for boosting the signal. You need to login into mywifiext.net. But, what to do if mywifiext not working ? Well, then there is a need for troubleshooting the Netgear extender. The not working of the extenders is the issue which you can easily resolve by yourself with very simple steps. Do you need any help with the troubleshooting of the issue mywifiext not working. Well, you are in the right place. To have all the help. In this blog, the ways to troubleshoot the Netgear WiFi extender are explained. So, check out all those steps, and resolve your issue.  Steps To Resolve mywifiext Not Working Issue    To use the extender, it is very important to do the configuration. If the configuration won’t be done, then how the extender would get to know which network needs to be extended. And, for configuration, there is a need to go to mywifiext.net . Now, if the mywifiext not working, then you should go with the following

Mywifiext | Mywifiext.net Setup | www.mywifiext.net Login

Image
  Extenders have become a great need when everyone is doing their work from homes. As there is a need for good signal strength at every corner of the home. With the Netgear extender, it is possible. But, first there is a need to complete the Mywifiext.net Login for the Netgear extender. So, it is very important that you should go with the right steps as it is part of the setup. Therefore, in this blog, you will know about the steps you should follow for the Mywifiext.net Login . So, let’s get started to have all the help that you need to have for the successful login. Steps To Complete The Mywifiext.net Login Though, extenders used to save the extra bucks as there is no need to purchase the new connection. But, still there is a need for the setup in order to extend your signal. Therefore, follow the steps mentioned below in order to complete the login and setup in a right way: Step 1: Initially, you should connect the Netgear extender to the power source but in the same roo