192.168.1.250 New Extender Setup | Netgear Extender Setup With Default IP Address
It is not always necessary that there would be any link for the setup of your extenders. Instead of the access links, you can use the default IP address. You can use the 192.168.1.250 new extender setup to complete the setup of your Netgear extender. Therefore, in case, the access link is not working for you for the Netgear extender setup. Then, you can enter the default IP address 192.168.1.250, and complete the Netgear login. If you are looking for the steps to complete the 192.168.1.250 new extender setup. There is no need to go anywhere else as you are in the right place. In this blog, you will get the steps to complete the new Netgear extender setup in a few simple steps. So, let’s get started!

Learn How To Complete The 192.168.1.250 New Extender Setup

Using the default IP address always makes sure that there is no error in the access link for the router or the extender. So, it is always good to complete the setup with the default IP address. For the Netgear extenders, you need to use the IP address 192.168.1.250. So, to complete the setup with the default IP address, you should go with the following steps:
- First, connect your new Netgear extender to the power source and turn it on.
- After it gets On completely, then connect it to your updated system for the setup.
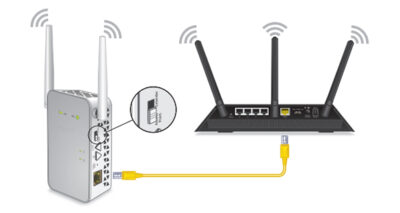
- It is recommended that you should connect your extender with the ethernet cable to avoid network variation issues.
- Now, open the browser and enter the default IP address 192.168.1.250 in the URL field.
- When you press the Enter key, then you will be redirected to the mywifiext login page.
- As you will see the login fields on the screen, therefore, enter the default login username and the password.
- When you click on the Login button, then you will be on the admin panel for your Netgear extender.
- If the setup was left for your extender, then the setup screen will open up for your extender.
- So, select the name of the network that you want to extend from the list.
- Also, enter the password for it.
- Click on the Connect button.
- If your network got extended, then your setup is successful.
- Now, connect your new extender at the desired location, and connect your wireless devices with it.
So, these are the steps to complete the Netgear extender setup with the default IP address i.e. 192.168.1.250.
Alternate For The Access Link!
Summing up! It is not important that the access link will always lead to the successful setup. As the alternative, you can also use the default IP address for the setup and login for the Netgear extender. So, this blog has covered the steps for the 192.168.1.250 new extender setup. The IP address 192.168.1.250 is the default IP address for the Netgear extenders. Therefore, in case, you face any issue during the login or setup process, then you can contact experts for help. Just dial a toll-free number, and resolve your queries with experts in no time. So,go with the alternative of the access link and complete the setup.


Comments
Post a Comment