How Do I Complete the Netgear AC750 Setup
When you purchase a brand new Netgear AC750 WiFi range extender, you need to complete the setup of the Netgear AC750 WiFi extender. Netgear AC750 Setup extends the existing home WiFi network to hard-to-reach places. You can complete the setup of the Netgear AC750 WiFi range extender either through the WPS method or through the web browser. If you don’t know how to set up the Netgear AC750 WiFi range extender then this blog will assist you. So, without taking much time, let’s get started with the setup procedure of the Netgear AC750 WiFi range extender.

Simple steps to set up the Netgear AC750 WiFi range extender through the WPS button
Setting up the Netgear AC750 WiFi range extender through the WPS button is very easy. You just need to locate and press the WPS button on the router and Netgear AC750 extender. Follow the below-mentioned steps to set up the Netgear AC750 WiFi range extender by pressing the WPS button:
Step 1: First and foremost, you need to plug your Netgear AC750 WiFi range extender into the power socket and then turn it on.
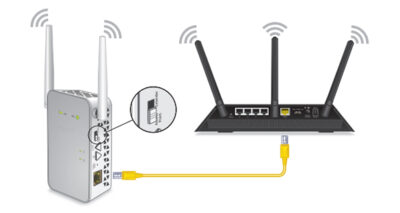
Step 2: Place the home Netgear AC750 WiFi range extender near the home router to complete the setup process.
Step 3: Now, locate and press the WPS button on the Netgear AC750 WiFi range extender for 2 seconds.
Step 4: Then, locate and press the WPS button on the main router within 2 seconds.
Step 5: After connecting the Netgear AC750 extender to the router, unplug the extender and place it in a new location.
Step 6: Now, try to connect your WiFi-enabled device to the extended network in a weak WiFi router coverage place.
Simple steps to set up the Netgear AC750 WiFi range extender through the web browser
If your home router does not support the WPS button then use the web browser method to set up the Netgear AC750 extender. Go through the below-given steps to set up the Netgear AC750 WiFi range extender setup :
Step 1: First of all, plug your Netgear AC750 WiFi range extender near to the home router.
Step 2: Now, an Amber light will blink on the Netgear AC750 extender and then the light will turn green.
Step 3: After that, launch a preferred web browser on your computer and go to the official website of Netgear extender and tap on the next button.
Step 4: Then, you will be navigated to the setup page of the Netgear WiFi range extender where you need to tap on the “new extender setup” button.
Step 5: Next, enter your username and password in the required field to create an account for your Netgear extender then tap on the next button.
Step 6: In the next step, click on “WiFi range extender button” or “access point”
Step 7: Finally, choose your existing WiFi network from the list that you want to extend.
Step 8: Then, follow the on-screen instructions to complete the Netgear AC750 WiFi range extender setup.
Hopefully, by following the above-mentioned steps you can complete the Netgear AC750 Setup hassle-free.


Comments
Post a Comment