How To Perform Netgear AC1200 Wifi Range Extender Setup Without WPS?
Netgear AC1200 Wifi range extender comes with AC dual-band technology and provides an unbelievably fast network range of up to 1200 Mbps. It utilizes 2.4 GHz and 5GHz frequency bands to extend the signals to poor network recipient zones. This is not like other ordinary wifi range extenders. It connects the wifi router to the wifi extender in a Fastlane connection. To use such advantages you need to do the Netgear AC1200 wifi range extender setup, initially. For that, you can use the Netgear AC1200 wifi range extender guide. It will take you through the setup procedure conveniently. In this blog also, we will discuss how to do the Netgear AC1200 Wifi Range Extender Setup.

The Netgear AC1200 wifi range extender setup can be performed using two methods, one is with the help of an installation assistant or internet browser method, and the other is the WPS push button method. Let’s discuss the installation assistant method.
Easy Instructions For Netgear AC1200 Wifi Range Extender Setup Without Using The WPS Button:
Using the WPS button, the wifi extender setup process becomes quite easy, but you can also set up your extender using the installation assistant. Follow the instructions written below to do the Netgear AC1200 wifi extender setup using the Installation assistant:
- Step 1: The first step is to keep your wifi extender in the same room as your wireless router.
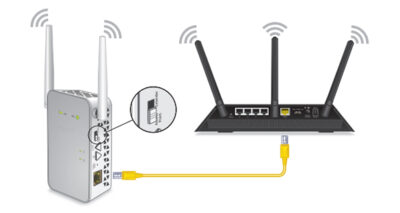
- Step 2: Plug the wifi range extender into a power socket and then switch it on.
- Step 3: On your PC device open the wifi settings and then look for the wifi range extender’s extended network.
- Step 4: Then you must open a web browser of your preference.
- Step 5: Then, log onto the web page mywifiext.net.
- Step 6: To log in to your range extender’s settings, enter your username and password in their allotted fields.
- Step 7: After logging in, the Netgear installation assistant will display on your screen.
- Step 8: Now walk ahead with the on-screen guidelines and then proceed with the setup.
- Step 9: Finally, detach the wifi range extender from its current plug point and then plug it anywhere in the home or office.
- Step 10: Make sure there are no radioactive devices nearby because they hinder the signals.
Finishing The Extender Setup!
Finally, the Netgear AC1200 wifi range extender setup is done. Now, link all your internet-compatible devices with the extended network, and has unlimited access to super-fast internet with amazing coverage. The Netgear AC1200 wifi range extender guide is a convenient way to help you through the setup process, it explains the steps crisply and clearly. You may use the user manual to set up the wifi range extender. Enjoy Superfast Connection!


Comments
Post a Comment