mywifiext.local new extender setup
Looking for the setup of a new extender? In this blog, you will learn the methods of mywifiext.local new extender setup. If we are talking about mywifiext.local, it is not a local IP address. This web address is used to connect the WiFi extender. With mywifiext.local user can access with Netgear WiFi extender. There are several methods to connect with the WiFi extender. You can type either www.mywifiext.net or www.mywifiext.local in the web browser.
Generally, mywifiext.local is a website that allows you to perform the setup of Netgear WiFi extender. If you are a new user of Netgear WiFi extender, then you have to install the extender first. Here are some guidelines for the log in, installation and setup of the extender.
Steps to login with mywifiext.local?
You need to follow the following steps to login with mywifiext.local:
- First of all, connect the device with the Netgear extender network.
- After that, you need to open the web browser and type mywifiext.local in the address bar of the web browser and then press enter.
- Now, a Netgear extender login page will open.
- Then, you have to create a new account for mywifiext.local.
- After creating the username and password you will be directed to the Netgear range extender page.
How to Install the New Extender via mywifiext.local
Let’s discuss about the process of installation of new extender via mywifiext.local:
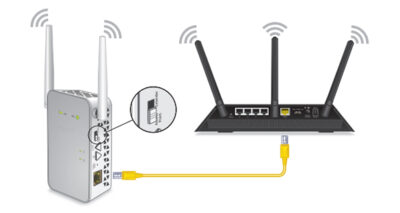
- First of all, you have to plug the extender into the socket.
- Then, you have to wait for the stable green light.
- Now, choose any wireless device such as phone, tablet or laptop that you want to connect with the Netgear extender.
- After that, you have to connect your device with the Netgear_Ext network.
- After finishing the connection, you have to open the web browser.
- You will automatically be redirected to mywifiext setup tab.
- If you are not redirected to the page, then type the web address manually.
- Now you are connected with mywifiext local web page.
Setup of New Extender via mywifiext.local
To set up the Netgear WiFi range extender, follow the following guidelines:
- First of all, you have to go to the WiFi settings and then you have to connect to the Netgear_ext network.
- Once you are connected with Netgear_Ext, then you need to open the web browser.
- In the address bar of the web browser type mywifiext.local and then enter.
- A Netgear extender login page will appear.
- Now, you need to create a new extender setup account.
- To complete the mywifiext local setup, you need to enter the password and username.
Not able to access it with mywifiext. Local?
If you are facing trouble with accessing mywifiext. Local, you need not to worry. Here is the solution for that. Follow the below mentioned guidelines:
- Double-check if the extender is plugged correctly.
- For the first-time installation, plug in the extender 2-3 feet away from the main router.
- Make sure that there is no typos error while typing the URL.
- Kindly factory reset the extender before reconnecting the extender.
Conclusion
So, here is the complete blog about mywifiext.local new extender setup. Hopefully, by following the above-mentioned steps you can easily set up your new Netgear extender. If there is a problem with any step, you can contact the technical professionals. They will guide you.


Comments
Post a Comment