How To Explain Netgear AC750 Setup In Easy Steps?
Tired of network unavailability in certain areas of your home? Then, you must get your hands on the Netgear AC750 wifi range extender. We assume if you are reading this then you already have got yourself the Netgear AC750 wifi range extender. It provides an internet speed of up to 750 Mbps. For Netgear AC750 setup, follow the guidelines stated in this blog below. This explains the setup via three different methods namely,

- Manual Method by using the Installation Assistant
- WPS Method
- Nighthawk App
Netgear AC750 Setup Via Installation Assistant:
- The first step is to switch on your Netgear AC750 wifi range extender.
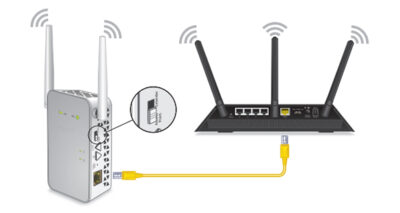
- The location of your wireless router and extender must be in the same room.
- Now, plug the wifi range extender into a power supply socket.
- Open the desired web browser and enter the address www.mywifiext.net. Get in touch with our technical issues if this site is not opening on your system.
- The Netgear AC750 installation will reflect on your screen.
- Start following the prompts on your screen to begin the Netgear AC750 setup.
- Relocate the Netgear AC750 wifi range extender to some new location now.
- In case you observe a poor or absolutely no connection then move your extender closer to the router and try connecting again till the LED light indicators turn stable.
- Once you have figured out the best location for your wifi extender to plug in, connect other devices to the extended network as well.
- A perfectly set up Netgear AC750 wifi extender is indicated by the 4 LED light indicators. All 4 of these must be steady.
Netgear AC750 Setup Via WPS Method:

It is easier to connect your extender to the router if both of them contain the WPS button.
To start with the setup, first, Bring the router and Netgear extender to the same room.
Now, plug in the wifi range extender and turn it on.
After that, press the WPS button on your Netgear AC750 wifi extender.
Within the next 1 or 2 minutes press the WPS button on your router as well.
The devices will connect automatically.
After that, place your router in a new location where the network is not received properly.
Now, shift your wifi-enabled PC device to the area where network coverage is good.
Now, link your device to the Netgear AC750 range extender’s extended network.
Netgear AC750 Setup Via Nighthawk App:
To download the nighthawk app, ensure that your wireless network connection is accessible.
Now, keep a note of the router’s network SSID and passkey.
After that switch on the Netgear wifi extender.
Now from your Apple or Google play store download the nighthawk app on your smartphone.
Now, launch the nighthawk app on your mobile phone.
Simply follow the on-screen guidelines to complete the Netgear AC750 wifi range extender by connecting it to the wireless router network.
Netgear AC750 Wifi Extender Setup Done!
Now, do you have any confusion or doubts regarding the Netgear AC750 setup? Well, we don’t think so. The guidelines written above are very easy to perform. All three ways of setting up your Netgear wifi extender are convenient and quick. Netgear extenders are believed to be the best in what they do. So now you can also enjoy the extended network coverage and high-speed internet connection.


Comments
Post a Comment